Construction Stage Modeling and Analysis of PSC BOX Girder Bridge
1. Overview
The structural analysis and cross-section design process in MIDAS CIVIL is as follows:
PSC%20Box%20%EB%8B%A8%EB%A9%B4%EC%84%A4%EA%B3%84%20%EA%B3%BC%EC%A0%95.png?width=6272&height=1040&name=(EN)PSC%20Box%20%EB%8B%A8%EB%A9%B4%EC%84%A4%EA%B3%84%20%EA%B3%BC%EC%A0%95.png)
MIDAS CIVIL provides modeling convenience through the support of the Wizard, offering various purpose-specific Wizard functions for PSC Box Bridges.
%EB%AA%A8%EB%8D%B8%EB%A7%81%20%EC%9C%84%EC%9E%90%EB%93%9C.png?width=15652&height=8812&name=(EN)%EB%AA%A8%EB%8D%B8%EB%A7%81%20%EC%9C%84%EC%9E%90%EB%93%9C.png)
- FCM, MSS, FSM, ILM, Grillage Model
In this content, we will introduce the Grillage Model Wizard function, one of the most commonly used bridge types in Europe, by referring to overseas webinars conducted by MIDAS IT.
2. Construction Stage Analysis & Calculation Process of PSC BOX Girder Bridge
Learn about the step-by-step process using the Grillage Model Wizard, considering construction stage analysis and time-dependent material properties.
- Step 1: Definition of Bridge Section and MaterialsDefine the bridge section and materials used using MIDAS CIVIL.
Specify the concrete grade as C40/50 and set the prestressed reinforcement.
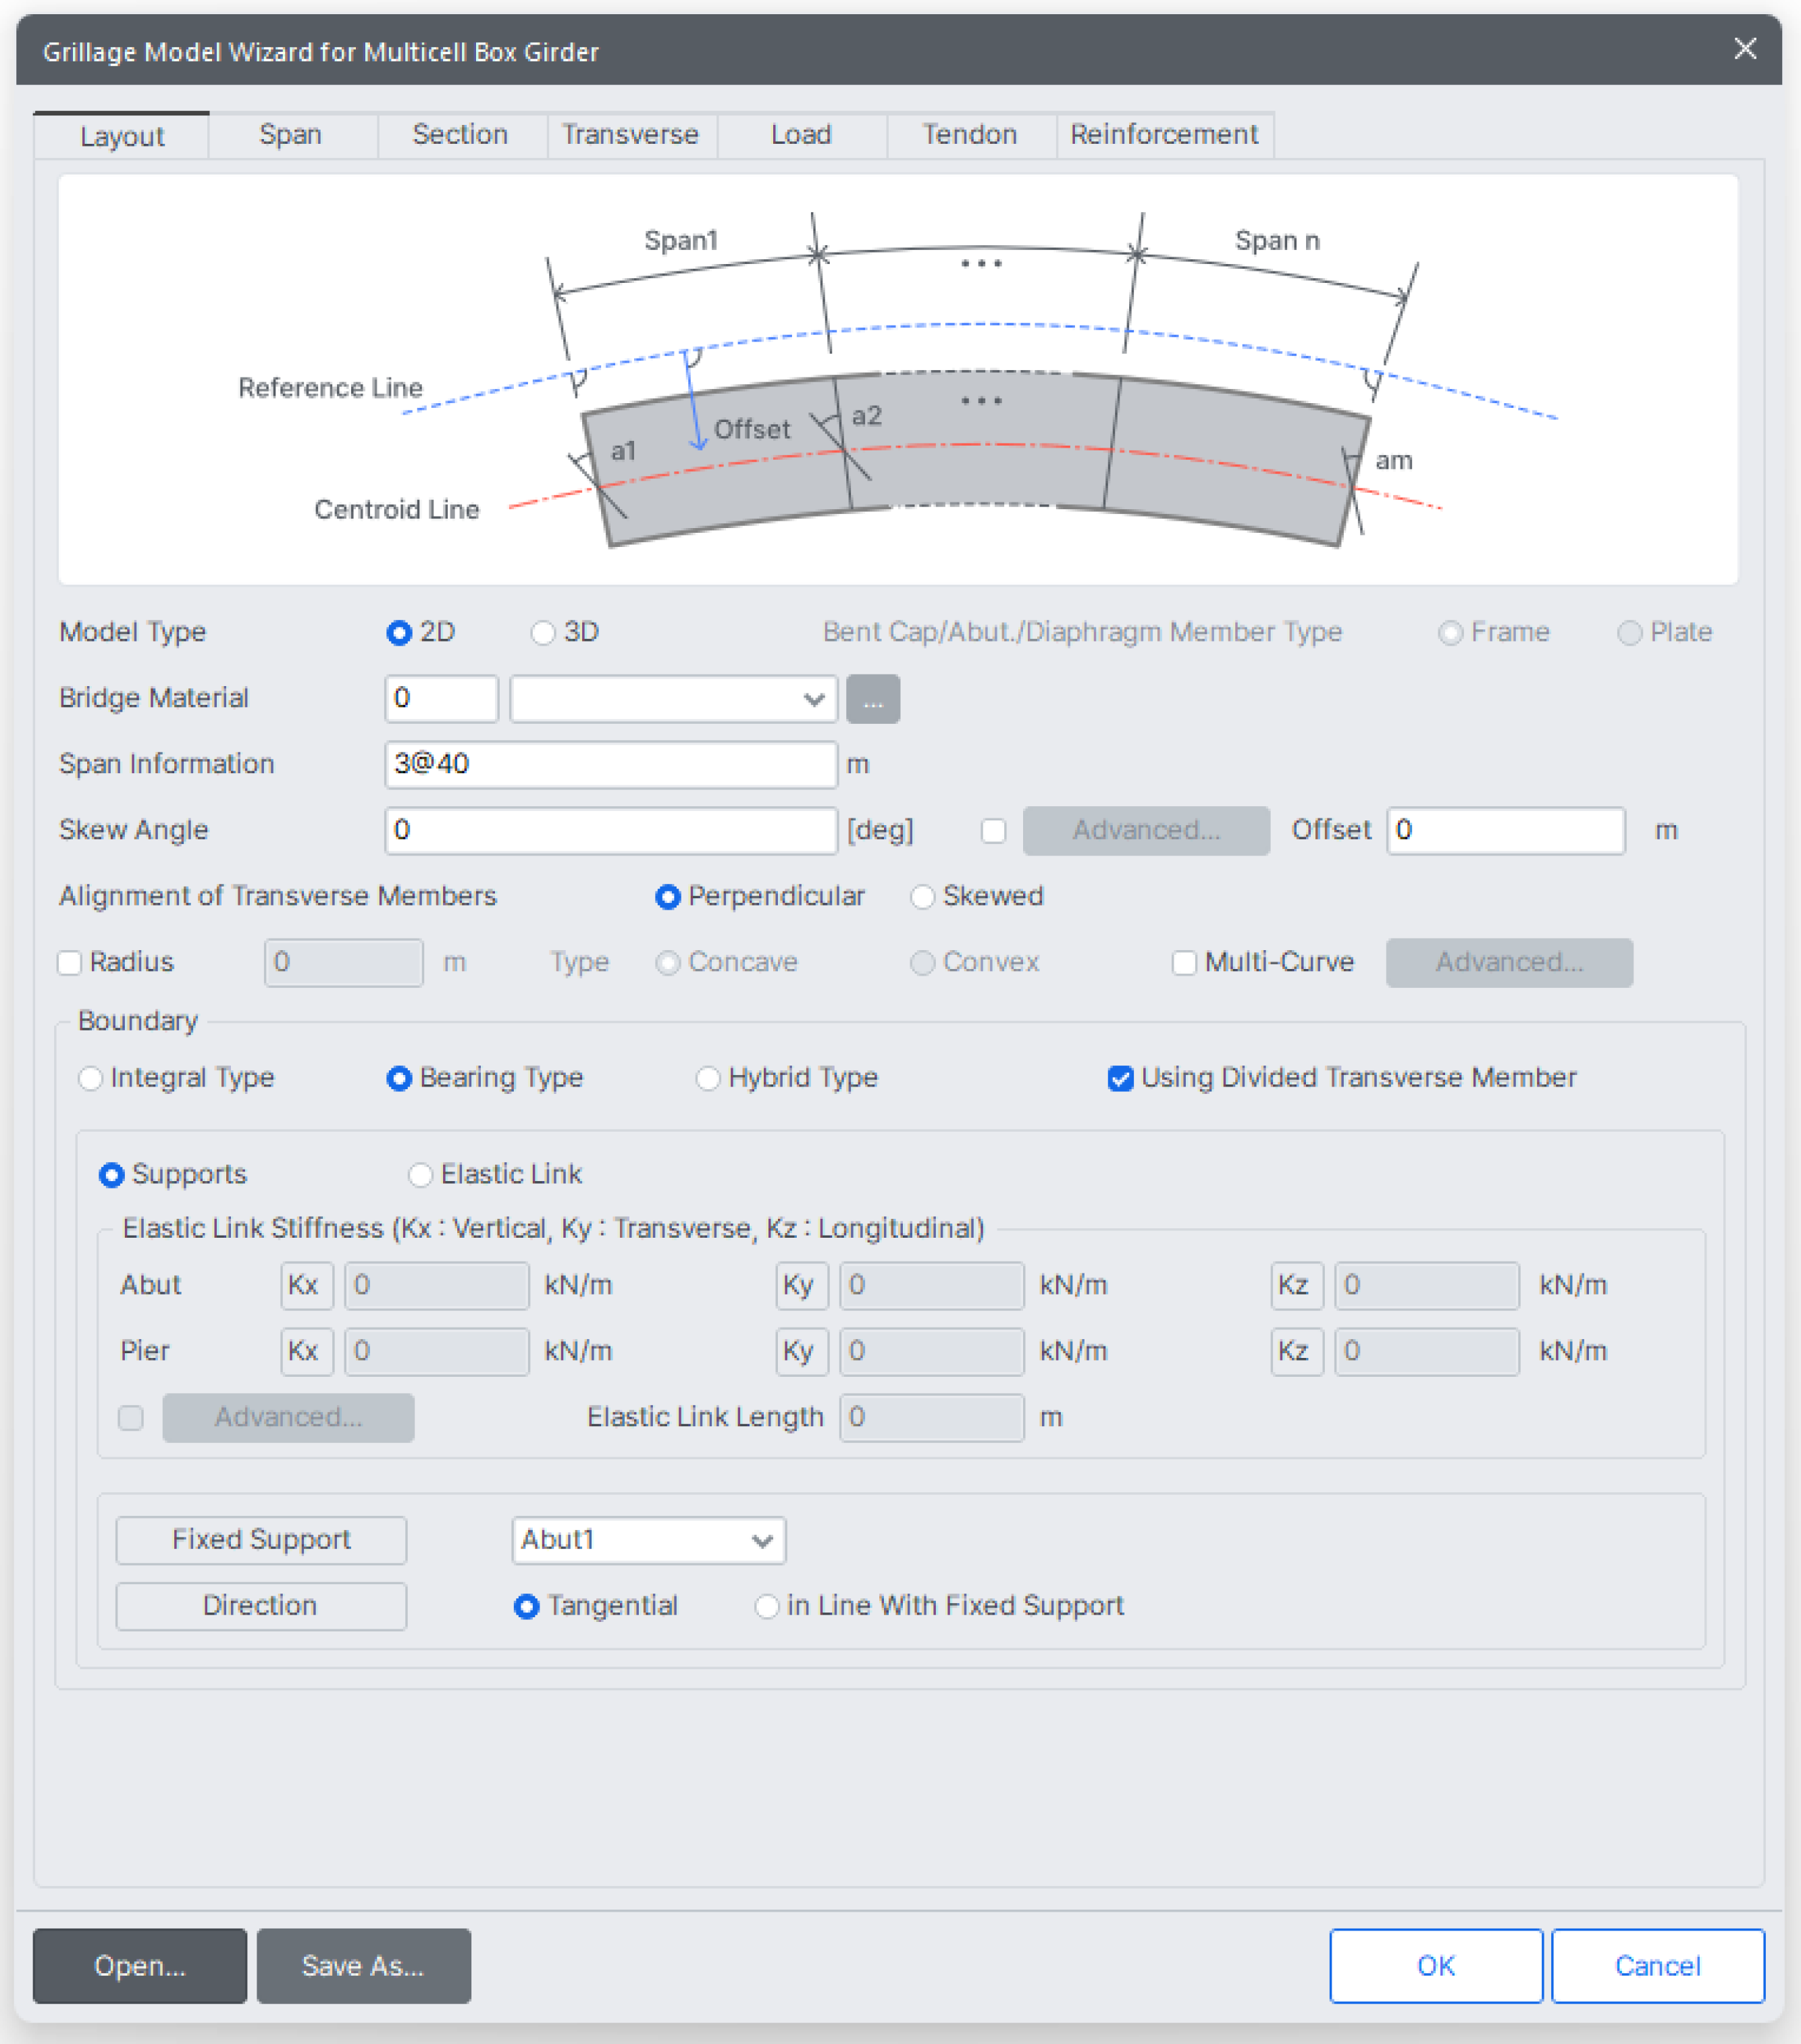
- Step 2: Grillage Model SelectionUtilize the grid model (Grillage Model) of MIDAS CIVIL to define the bridge in 2D elements.
Here, concrete with C40/50 material is used, and a bridge with a span of 3 will be created.
-
Step 3: Section Definition
Define the section and input dimensions for the cross-section.
Set the sizes and shapes of each part to create the overall shape of the bridge.
-
Step 4: Section Reinforcement Settings
Set reinforcement for the bridge section.
Add P25 and P20 reinforcement at the top and bottom, and also set P12 and P10 reinforcement to determine the strength.
-
Step 5: Tendon Settings
Define tendons and input the required quantity and size.
Create prestress tendons and apply each tendon to the bridge.
-
Step 6: Load Settings
Define loads applying on the bridge.
Apply loads such as self-weight, wind load, and vehicle load to the model.
-
Step 7: Load Combinations
Select various design criteria provided by MIDAS CIVIL to automatically generate load combinations according to the design criteria.
Check how the bridge behaves under various conditions.
-
Step 8: Analysis and Results Verification
Analyze the stress and displacement of the bridge using MIDAS CIVIL and visually confirm the results.
-
Step 9: Report Verification and Validation
Initially, check the strength and shear strength of the bridge through the report.
Analyze specific sections of the bridge.
Define parameters for reinforcement and select the sections to be designed, then review them according to the criteria provided.
-
Step 10: Result Verification
After the analysis is complete, check the result tables.
This allows for a detailed examination of various aspects of the bridge.
Export results to an Excel report.
-
Step 11: Bill of Material and Other Information Verification
MIDAS CIVIL provides essential information related to the quantity of materials used.
Detailed information about tendons and other components can also be reviewed.
-
Step 12: Construction Stage Modeling
Convert the model to a construction stage model to simulate construction scenarios.
This allows for predicting the form and behavior of the structure in advance.
-
Step 13: Load and Combination Resetting
Reset loads for the construction stage, readjust combinations, and consider the loads required for actual construction.
-
Step 14: Results Analysis and Modification
Analyze the results from the construction simulation, modify designs if necessary, and establish an optimal construction plan.
Through these steps, it is possible to design a PSC BOX Girder Bridge efficiently, considering the construction phase, and ensuring the stability and durability of the bridge.
3. Conclusion
This content provides insights into MIDAS CIVIL's Grillage Model Wizard, showcasing the modeling, analysis, and cross-section design process for PSC BOX Girder Bridges. While the Wizard may not cover all shapes, it significantly reduces modeling time for typical PSC BOX Girder Bridge shapes.
Explore more about PSC BOX Girder Bridge design and construction with MIDAS CIVIL, making your analysis modeling process efficient and effective.