OVERVIEW
There are cases where the design must be satisfied for two or more conditions for the same structure. In general, the design needs to be performed considering the load during construction and the load in use at the same time, as shown below. In this document, I will introduce how to perform two analyses simultaneously.
√ Page Contents
1. Modeling
2. Loading
3. The Setting of Boundary Condition
4. Running an Analysis
5. Running an Analysis: Checking Result-1
6. Running an Analysis: Checking Result-2
7. Running a Design
8. Combined Design Case
9. Running a Design: Checking Design Result
Case 1: During Construction
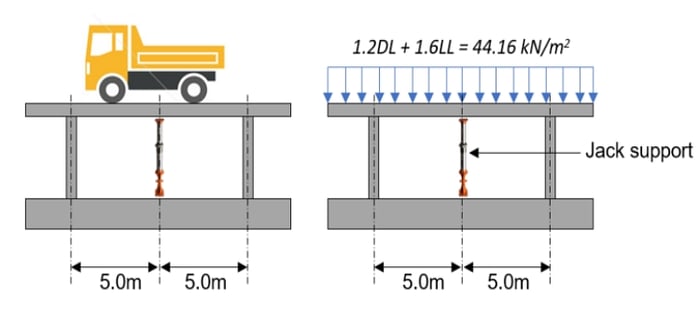
| Dead Load | Slab (200mm) = 4.80kN/m2 |
| Live Load |
Vehicle load = 24.00kN/m2 * It is the value considered as an impact factor. |
| 1.2DL + 1.6LL | = 44.16kN/m2 |
Case 2: In Use
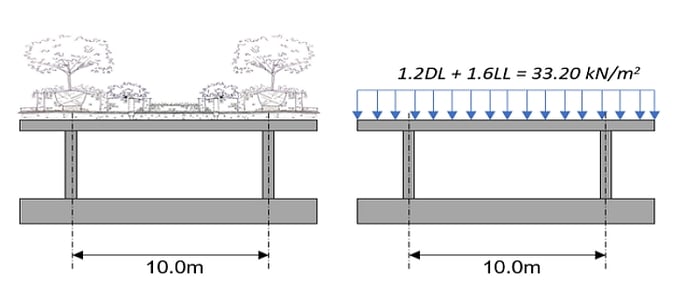
| Dead Load |
Topping soil (900mm) = 16.20kN/m2 Slab (200mm) = 4.80kN/m2 |
| Live Load |
Landscape load = 5.00 kN/m2 *It is the value considered as an impact factor. |
| 1.2DL + 1.6LL | = 33.20kN/m2 |
Modeling
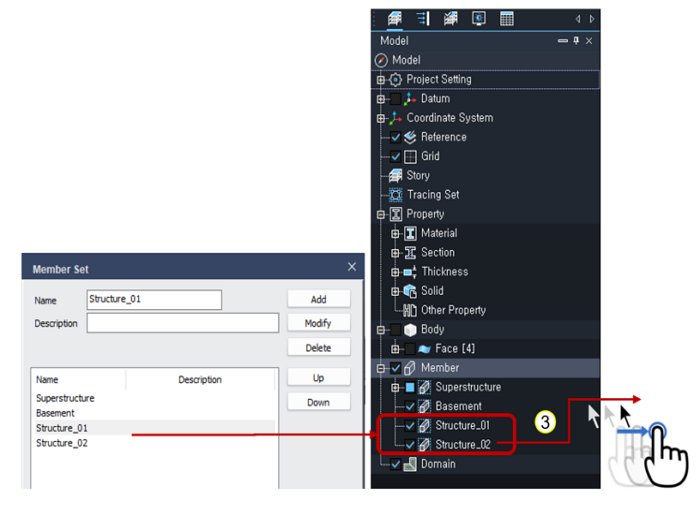
Step 1: Add & assign a member set.
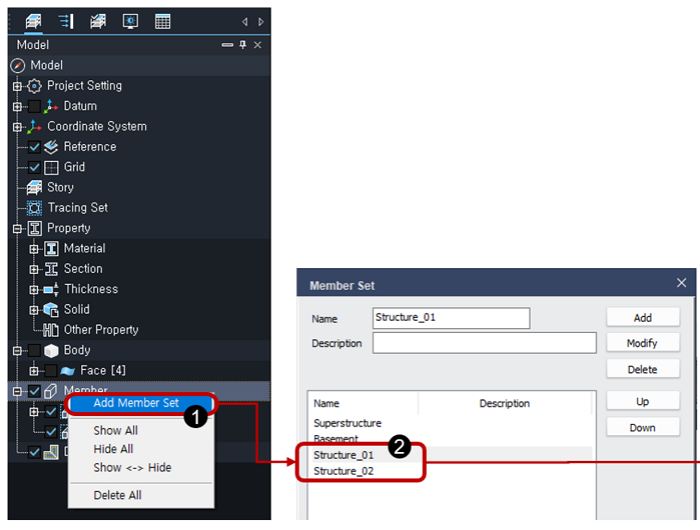
1) Click 'Add Member Set'.
2) Add a new member set of 'Structure_01~02'.
 3) Assign the base members to 'Structure_01' by Selecting the members and dragging in a model tree.
Step 2: Add jack support members & assign a member set.
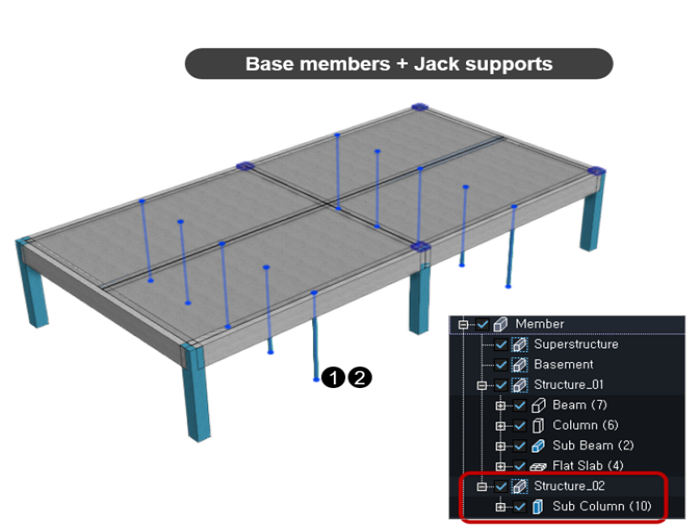
1) Add the members of jack support in the model.
2) Select the members of jack support.
3)Assign the members of jack support to 'Structure_02' by dragging in a model tree.
Loading
Step 3: Create a slab load.
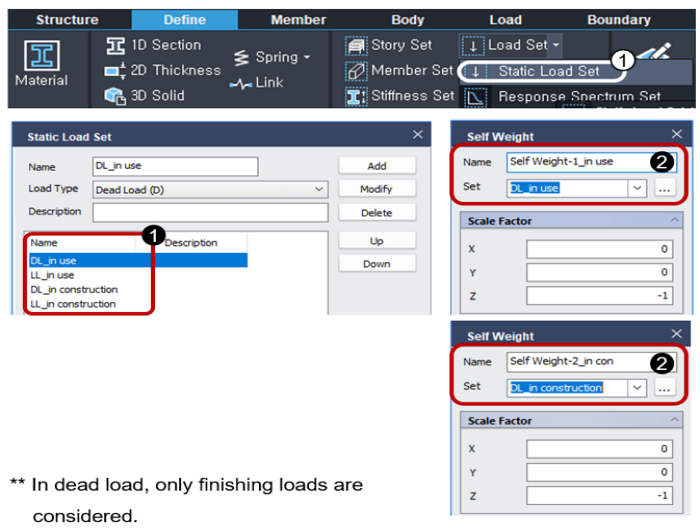
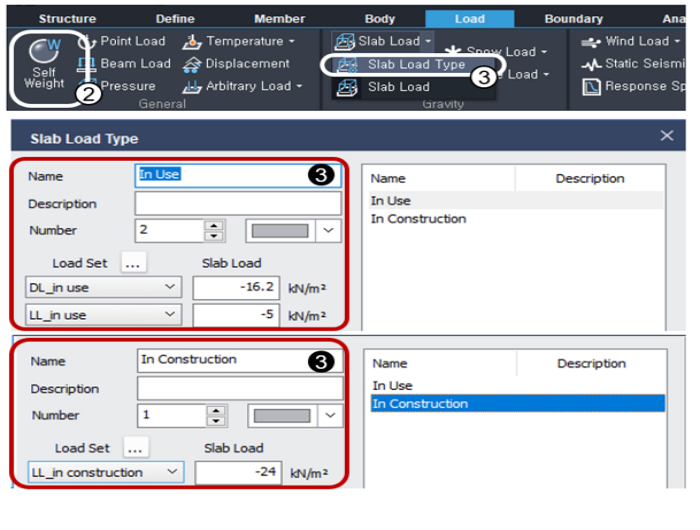
1) Define 'Static Load Set'.
2) Create 'Self-weight' of slabs.
3) Add a slab load for each case.
Step 4: Assign slab loads to slab members.
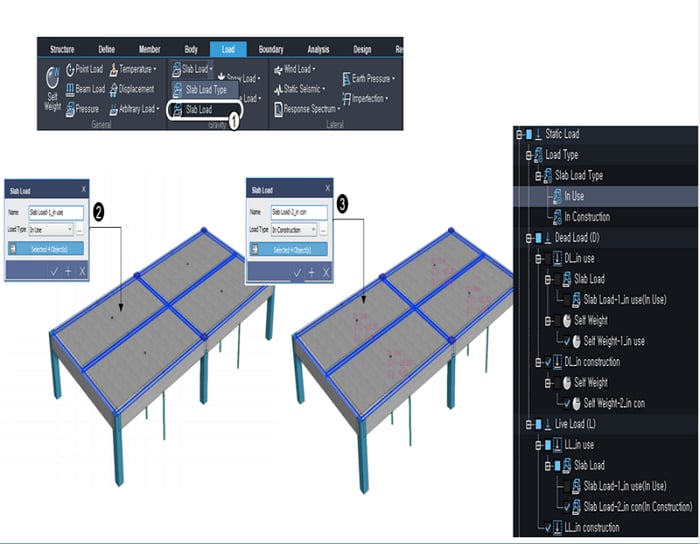 1) Run 'Slab Load'.
2) Assign the slab load for 'In Use' to slabs.
3) Assign the slab load for 'In Construction' to slabs.
Step 5: Create 'Support Set'.
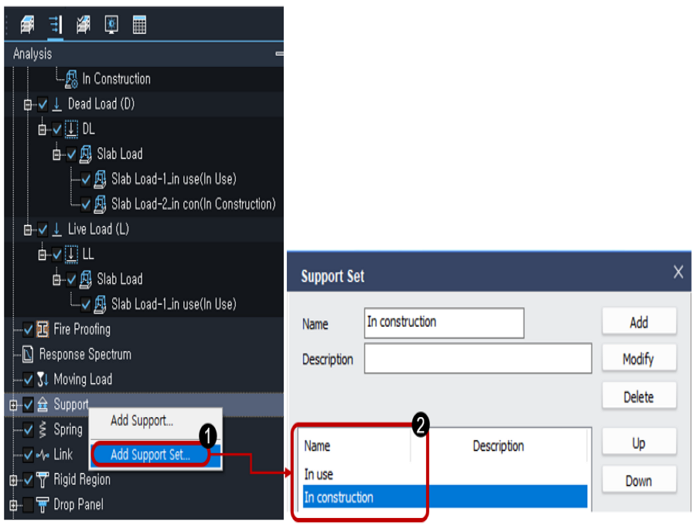
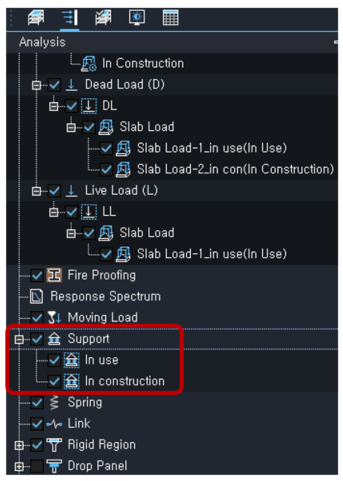
1) Run 'Slab Lod'.
2) Assign the slab load for 'In Use' to slabs.
3) Assign the slab load for 'In Construction' to slabs.
The Setting of Boundary Condition
Step 6: Assign the support set to columns.
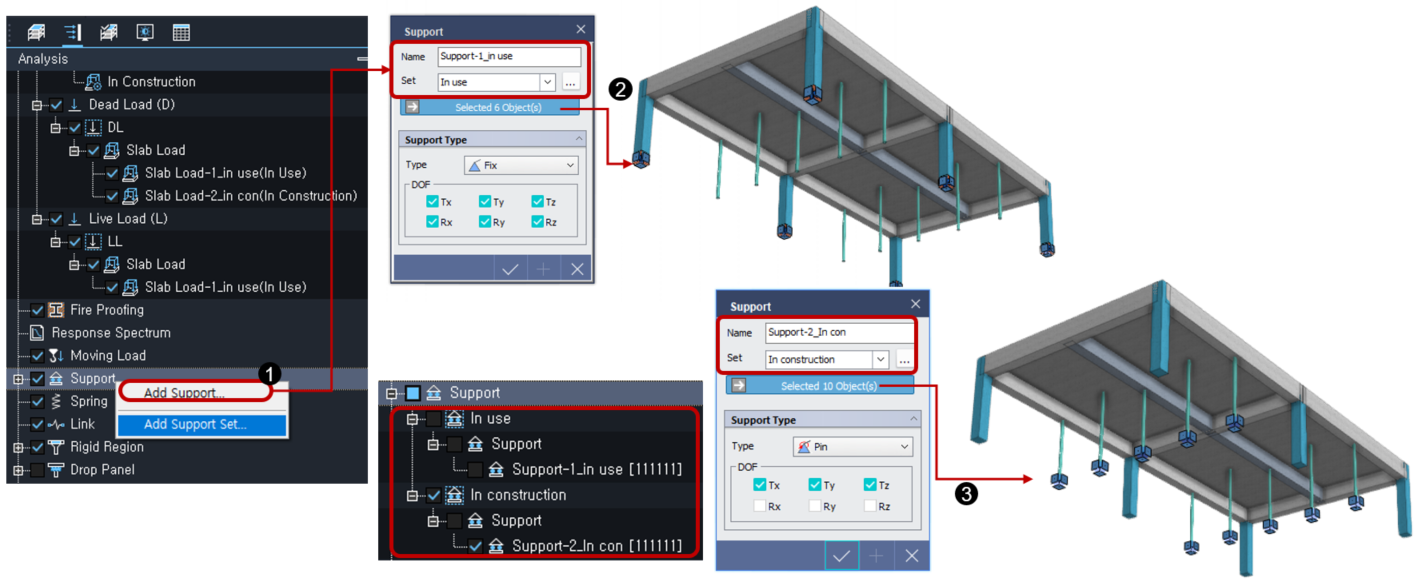
1) Run 'Ad Support' in the analysis tree.
2) Assign the support for 'In Use' to slabs at the bottom of RC columns.
3) Assign the support for 'In Construction' at bottom of jack supports members.
Running an Analysis
Step 7: Create an analysis case.

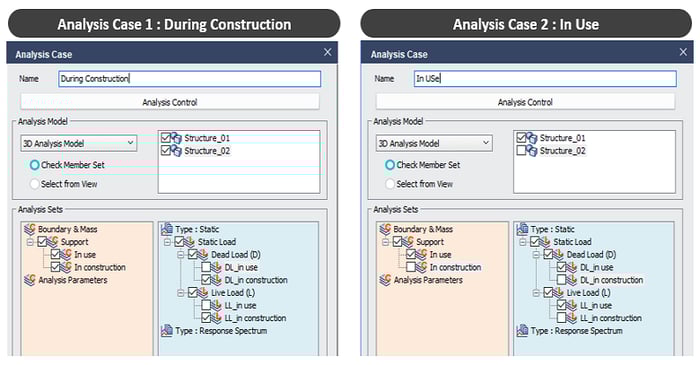
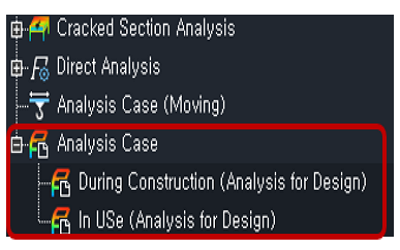
* Select each applied member, load, and boundary condition to create an analysis case.
Running an Analysis: Checking Result-1
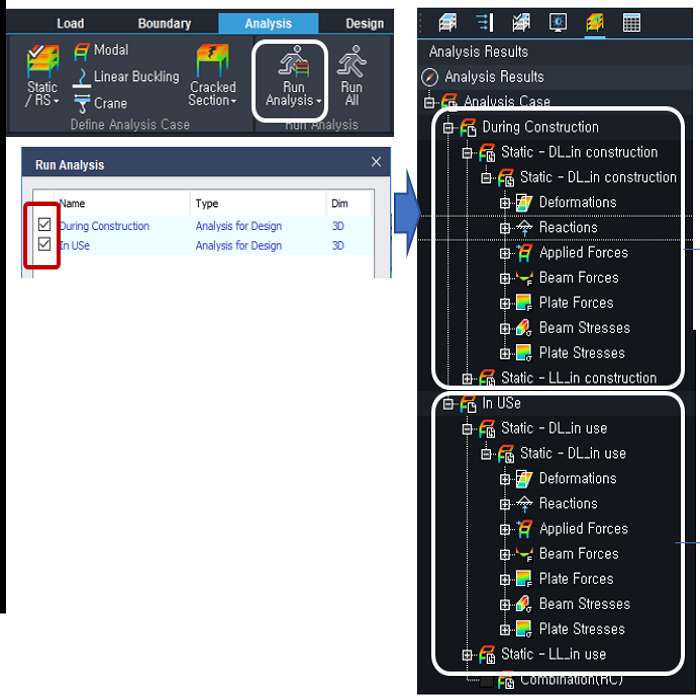
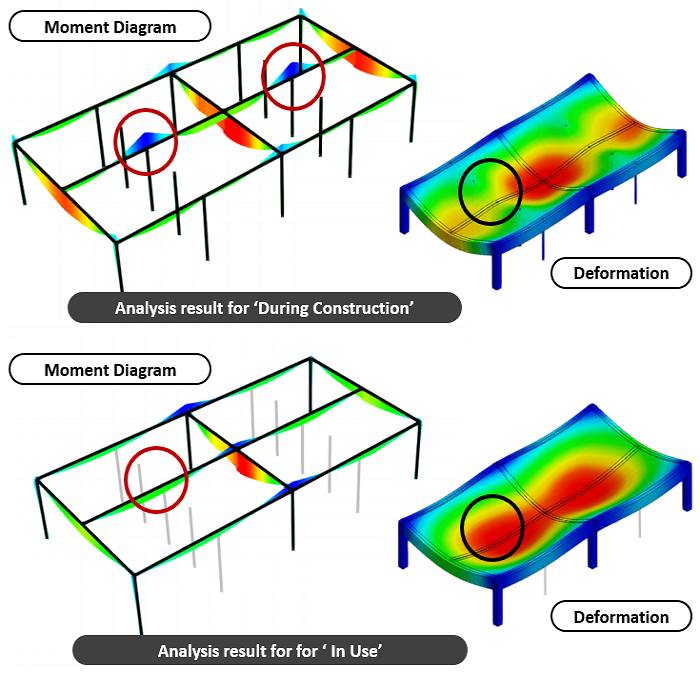
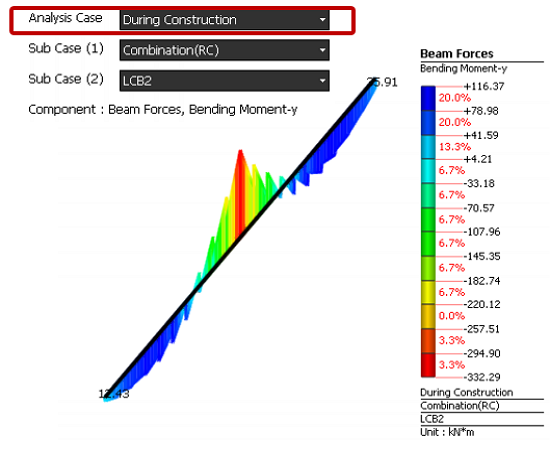
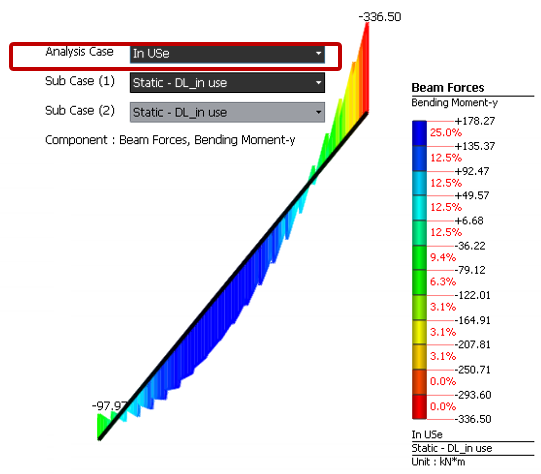
According to the load and boundary conditions, the results for each analysis case are different, as shown below.
Running an Analysis: Checking Result-2
 Case 1: During Construction
Case 2: In Use
.
Running a Design
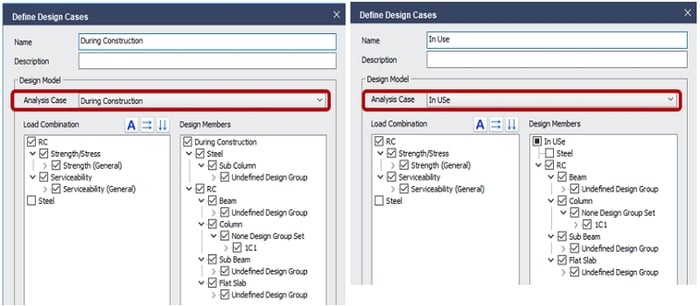
Step 8: Create design cases.
 Design Case 1: During Construction Design Case 2: In Use
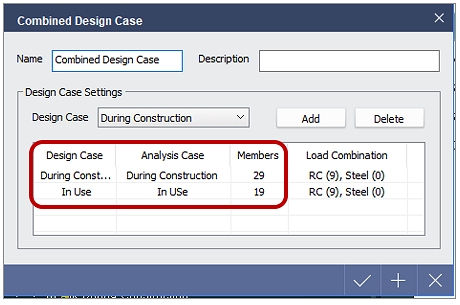
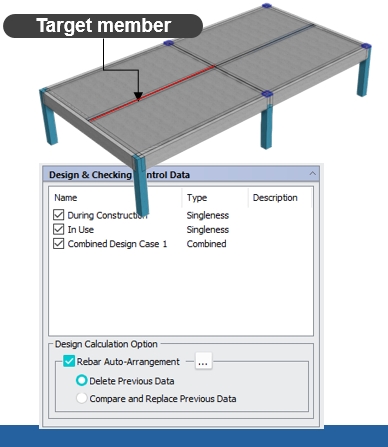
Combined Design Case
It performs the design considering both Design Case 1 and 2.
1) Two design cases are crated according to each analysis case.
2) Create a combined case for two design cases.
Running a Design: Checking Design Result
Each design case has a different number of main rebars.
Design result by 'During Construction' Design result by 'In Use'
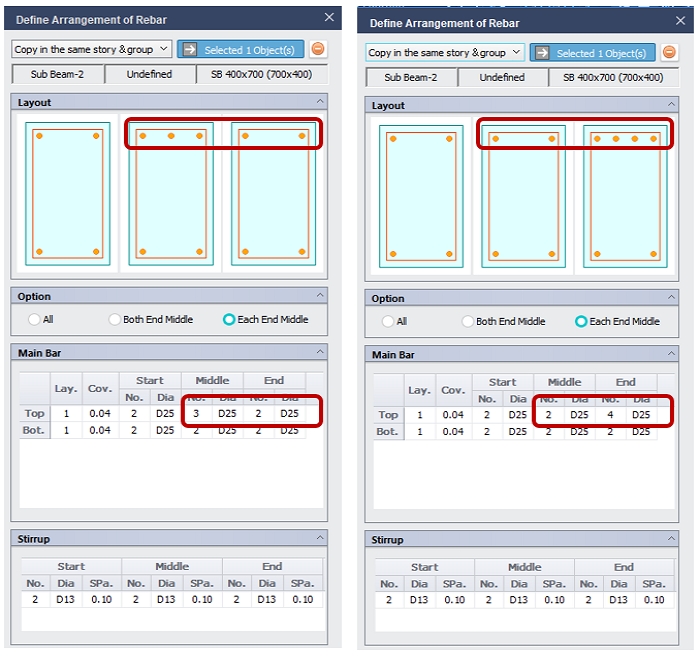
Design result by 'During Construction'
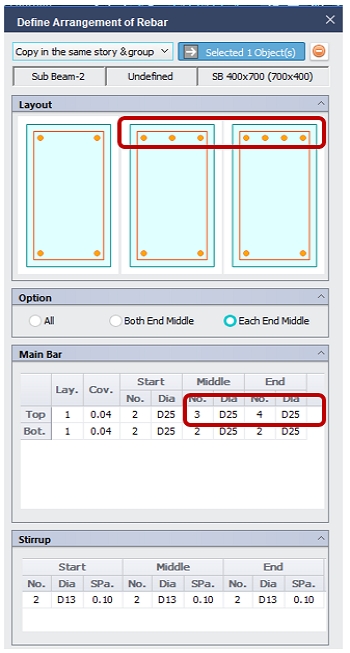 In the combined design case results, the reinforcement was recalculated considering the results for both design cases.